Installation
The release page has pre-compiled binaries for macOS, Windows, Linux and FreeBSD. The Linux binary is a static executable that can be run on any Linux distribution.
You can also use your OS package manager.
You can install PostgREST from the Homebrew official repo.
brew install postgrest
You can install PostgREST from the official ports.
pkg install hs-postgrest
You can install PostgREST from the community repo.
pacman -S postgrest
You can install PostgREST from nixpkgs.
nix-env -i postgrest
You can install PostgREST via flake.
{
  inputs.postgrest.url = "github:postgrest/postgrest";
  # ...
}
You can install PostgREST using Chocolatey or Scoop.
choco install postgrest
scoop install postgrest
Supported PostgreSQL versions
Supported |
PostgreSQL >= 13 |
PostgREST works with all PostgreSQL versions still officially supported.
Running PostgREST
If you downloaded PostgREST from the release page, first extract the compressed file to obtain the executable.
# For UNIX platforms
tar Jxf postgrest-[version]-[platform].tar.xz

# On Windows you should unzip the file
Now you can run PostgREST with the --help flag to see usage instructions:
# Running postgrest binary
./postgrest --help

# Running postgrest installed from a package manager
postgrest --help

# You should see a usage help message
The PostgREST server reads a configuration file as its only argument:
postgrest /path/to/postgrest.conf

# You can also generate a sample config file with
# postgrest -e > postgrest.conf
# You'll need to edit this file and remove the usage parts for postgrest to read it
For a complete reference of the configuration file, see Configuration.
Note
If you see a dialog box like this on Windows, it may be that the pg_config program is not in your system path.
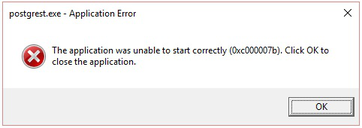
It usually lives in C:Program FilesPostgreSQL<version>bin. See this article about how to modify the system path.
To test that the system path is set correctly, run pg_config from the command line. You should see it output a list of paths.
Docker
You can get the official PostgREST Docker image with:
# pull the latest version
docker pull postgrest/postgrest

# to pull a particular version, use one of the versions on https://hub.docker.com/r/postgrest/postgrest/tags
docker pull postgrest/postgrest:<version>
To configure the container image, use Environment Variables.
There are two ways to run the PostgREST container: with an existing external database, or through docker-compose.
Containerized PostgREST with native PostgreSQL
The first way to run PostgREST in Docker is to connect it to an existing native database on the host.
# Run the server
docker run --rm --net=host \
  -e PGRST_DB_URI="postgres://app_user:password@localhost/postgres" \
  postgrest/postgrest
The database connection string above is just an example. Adjust the role and password as necessary. You may need to edit PostgreSQL’s pg_hba.conf to grant the user local login access.
Note
Docker on Mac does not support the --net=host flag. Instead you’ll need to create an IP address alias to the host. Requests for the IP address from inside the container are unable to resolve and fall back to resolution by the host.
sudo ifconfig lo0 10.0.0.10 alias
You should then use 10.0.0.10 as the host in your database connection string. Also remember to include the IP address in the listen_address within postgresql.conf. For instance:
listen_addresses = 'localhost,10.0.0.10'
You might also need to add a new IPv4 local connection within pg_hba.conf. For instance:
host all all 10.0.0.10/32 trust
The docker command will then look like this:
# Run the server
docker run --rm -p 3000:3000 \
  -e PGRST_DB_URI="postgres://app_user:password@10.0.0.10/postgres" \
  postgrest/postgrest
Containerized PostgREST and db with docker-compose
To avoid having to install the database at all, you can run both it and the server in containers and link them together with docker-compose. Use this configuration:
# docker-compose.yml

version: '3'
services:
  server:
    image: postgrest/postgrest
    ports:
      - "3000:3000"
    environment:
      PGRST_SERVER_HOST: 0.0.0.0 # necessary for `postgrest --ready` flag to work
      PGRST_DB_URI: postgres://app_user:password@db:5432/app_db
      PGRST_OPENAPI_SERVER_PROXY_URI: http://127.0.0.1:3000
    depends_on:
      - db
  db:
    image: postgres
    ports:
      - "5432:5432"
    environment:
      POSTGRES_DB: app_db
      POSTGRES_USER: app_user
      POSTGRES_PASSWORD: password
  # Uncomment this if you want to persist the data.
  # volumes:
  #   - "./pgdata:/var/lib/postgresql/data"
Go into the directory where you saved this file and run docker-compose up. You will see the logs of both the database and PostgREST, and be able to access the latter on port 3000.
If you want to have a visual overview of your API in your browser you can add swagger-ui to your docker-compose.yml:
# in services:
  swagger:
    image: swaggerapi/swagger-ui
    ports:
      - "8080:8080"
    expose:
      - "8080"
    environment:
      API_URL: http://localhost:3000/
With this you can see the swagger-ui in your browser on port 8080.
Building from Source
When a pre-built binary does not exist for your system you can build the project from source.
You can build PostgREST from source with Stack. It will install any necessary Haskell dependencies on your system.
Install Stack for your platform
Install Library Dependencies
Operating System
Dependencies
Ubuntu/Debian
libpq-dev, libgmp-dev, zlib1g-dev
CentOS/Fedora/Red Hat
postgresql-devel, zlib-devel, gmp-devel
BSD
postgresql12-client
macOS
libpq, gmp
Build and install binary
git clone https://github.com/PostgREST/postgrest.git
cd postgrest

# adjust local-bin-path to taste
stack build --install-ghc --copy-bins --local-bin-path /usr/local/bin
Note
If building fails and your system has less than 1GB of memory, try adding a swap file.
–install-ghc flag is only needed for the first build and can be omitted in the subsequent builds.
Check that the server is installed:
postgrest --help.